Wednesday, June 15, 2011

Zaycon Foods

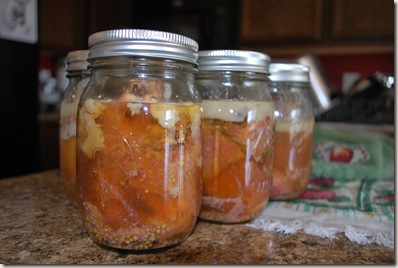
I’ve recently been introduced to a company called Zaycon Foods.  They supply bulk meats at a reasonable wholesale price.  I made a large order of boneless, skinless chicken breast.  I was able to bottle all 40 lbs of the order in about 3 hours, with the use of my sister’s pressure cooker in addition to my own. 

20110611_222736 20110611_223852

The kinds of foods they offer vary.  I’m anxious to see the price and type of foods that they will offer in the future. 

For now, I recommend registering on their website, and receiving emails about their upcoming products.

Don’t forget to let them know that I referred you. 

My referral name is: AMcKane

Wednesday, May 11, 2011

Food Storage in Buckets

Do you want a fast and simply way to store your bulk food storage, like grains?  I recommend storing them in food grade buckets.  The process is simple, and you can do it in the comfort of your home.

What you’ll need:

Dry Ice
Food Grade Bucket
Food Grade Lid
Bulk Grains or Legumes

We personally found the food grade buckets and lids at a nearby Wal-Mart (located at Rittenhouse and Ellsworth in Queen Creek, AZ).

After following the directions below, you’ll need to wait a large number of hours for the dry ice to dissipate.  We let our buckets sit overnight, and that was about the right amount of time.  If you start the process first thing in the morning, the buckets will need to sit almost all day, and can be sealed before bedtime.

Something interesting to note here is, you don’t actually need to use dry ice, or oxygen absorbers to store sugar.  So, put your sugar in any food grade air tight container, and it will last forever on your shelf.

The following instructions were produced by the Church of Jesus Christ of Latter-day Saints.

Plastic Bucket Storage Instructions

Wednesday, March 23, 2011

Bottled Corned Beef

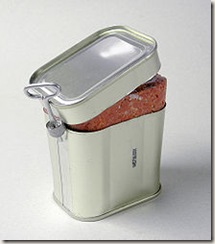
Since it’s a great time of the year to buy Corned Beef Briskets cheap at the store for St. Patrick’s Day, I decided to try my hand at bottling corned beef.  I figured that the real thing would be a million times better than the usual particle corned beef you can buy at the store.

220px-Corned-beef-1

Basically, the process is identical to bottling any other meat.  Simply cut the brisket into pieces, and put the raw meat into your mason jar.  Each corned beef brisket comes with a separate seasoning packet.  Evening distribute the seasoning packet amongst the jars.

Process the meat according to regular meat bottling pressure and times.

20110314_101512

To use the meat for traditional corned beef recipes, simply open a jar and add it to any recipe (ie. Corned beef and cabbage).  You may want to strain the chunky seasonings out of the broth surrounding the meat.

Friday, March 11, 2011

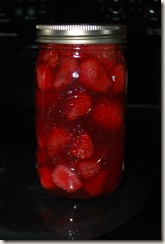
Strawberry Pie Filling (1 Quart)


20110311_171840

Ingredients:

3 1/2 cups Fresh Strawberries

1 cup Cold Water

3/4 cup Sugar + 2 Tbls. Sugar
1/4 cup Clear Jel + 1 Tbls. Clear Jel
3 1/2 tsp. Bottled Lemon Juice


Directions:


Start boiling a large amount of water in a pan. 

Remove the Greens, Wash and Drain the Strawberries.  Use only ripe firm strawberries.


Put the strawberries in the boiling water, and boil for about 1 minute.  This will blanch the strawberries killing any enzymes that my deteriorate the fruit over time.  Remove and drain the strawberries, set aside in a mixing bowl.

In a separate pan combine the cold water, sugar and clear jel.  Heat till thick and boiling, stirring constantly.  Add the lemon juice and cook for 1 more minute, stirring constantly.

Add this mixture to the blanched strawberries in the mixing bowl.  Stir, and spoon mixture into HOT jars (remember hot foods go into hot jars, and cold foods go into cold jars).  Leave one inch of headspace in the jar.

Top the jar with a boiled lid and ring before placing in a boiling water bath.  Boil the jars of the pie filling for 35-40 minutes.  Remove from water bath, and let cool overnight on a cooling rack. 

Before storing check each lid to make sure it sealed successfully.  Rinse the outside of the jar to remove any sticky residue.  Label and store, enjoy at will.

If by any chance the jar of pie filling didn’t seal properly, simply refrigerate and use within the week.

Sunday, March 6, 2011

Bottled Raw Blueberries (1 Quart)

blueberry-dump-cake

Ingredients:

Approximately 4 cups Fresh Blueberries

Water
Sugar

Directions:

Raw packing your fruit is probably the easiest way to preserve your favorite fruits.

Rinse and drain your blueberries, removing any mushy ones.  Put the blueberries directly into your COLD mason jar.

Make a simple syrup using the syrup ratio chart.  Pour the syrup over the blueberries.  Remove any air bubbles.

Add the boiled lid and ring to the jar.  Place in a boiling water bath.  Process for 20 minutes.

Let cool on a wire rack overnight.

Before storing check each lid to make sure it sealed successfully.  Rinse the outside of the jar to remove any sticky residue.  Label and store, enjoy at will.

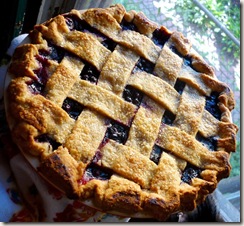
Bottled Blueberry Pie Filling (1 Quart)

blueberry pie 2 


Ingredients
:

3 1/2 cups Fresh Blueberries

1 cup Cold Water

3/4 cup Sugar + 2 Tbls. Sugar
1/4 cup Clear Jel + 1 Tbls. Clear Jel
3 1/2 tsp. Bottled Lemon Juice


Directions:


Start boiling a large amount of water in a pan.

Wash and Drain the Blueberries.  Remove any mushy blueberries from the batch.


Put the blueberries in the boiling water, and boil for about 1 minute.  This will blanch the blueberries killing any enzymes that my deteriorate the fruit over time.  Remove and drain the blueberries, set aside in a mixing bowl.

In a separate pan combine the cold water, sugar and clear jel.  Heat till thick and boiling, stirring constantly.  Add the lemon juice and cook for 1 more minute, stirring constantly.

Add this mixture to the blanched blueberries in the mixing bowl.  Stir, and spoon mixture into HOT jars (remember hot foods go into hot jars, and cold foods go into cold jars).  Leave one inch of headspace in the jar.

Top the jar with a boiled lid and ring before placing in a boiling water bath.  Boil the jars of the pie filling for 35-40 minutes.  Remove from water bath, and let cool overnight on a cooling rack. 

Before storing check each lid to make sure it sealed successfully.  Rinse the outside of the jar to remove any sticky residue.  Label and store, enjoy at will.

If by any chance the jar of pie filling didn’t seal properly, simply refrigerate and use within the week.

Monday, January 31, 2011

How to Blanch Fruit

Blanching fruit is simple and straight forward.  The purpose of blanching fruit is to remove the outer skin, that can become tough and chewy when cooked.  Blanching is frequently used for fruit like peaches and apricots.

  • Simply bring a large pot of water to a good rolling boil. 
  • Place the fruit in the boiling water in small batches. 
  • Allow the fruit to swim in the boiling water for 10-30 seconds.  (Some fruit may need to be blanched for longer to remove the skin...REMEMBER, the greener the fruit the longer you will need to blanch it to remove the skin). 
  • Remove the fruit from the pan of boiling water, and place in a bowl of ice water. 
  • Allow the fruit to cool before handling.
  • Peel the fruit.  The skin should separate easily from the fruit when blanched properly.
  • The fruit can then be sliced & pitted before continuing with your recipe.

Pressure Canning Processing Steps

Pressure Canning Processing Steps

Boiling Water Bath Canning Processing Steps

Boiling Water Bath Canning Processing Steps

Canning Processing Charts

Canning Processing Charts

Banana Bread

Banana Bread

1/2 cup Butter

1   1/2 cups Sugar

2 Eggs

1/2 cup Milk

1 tsp. Vanilla

3 Bananas (mashed)

2 cups Flour

2 tsp. Baking Powder

1 tsp. Baking Soda

1/4 tsp. Salt

1 tsp. Cinnamon

Cream together the butter and sugar.  Add the eggs mixing thoroughly and then add the milk.  Mix in the dry ingredients before adding the vanilla and bananas.  Bake at 350 degrees for 30-35 minutes or until cooked through.  Yields approximately 2 loafs.

Orange Chicken

Orange Chicken

Ingredients:

2 lbs boneless skinless chicken, chopped into bite sized pieces

1 egg

1  1/2 tsp. salt

Pepper to taste

Oil (for frying)

1/2 cup + 1 Tbsp. cornstarch

1/4 cup flour

2 Tbsp. minced ginger root

2 tsp. minced garlic

1/2 tsp. crushed hot red chili pepper (if you like spicy, this is the perfect amount...if you like mild, cut this amount in half)

1/2 cup chopped green onion

1/4 cup water

1/2 tsp. sesame oil

Orange Sauce for Stir Fry:

3 Tbsp. soy sauce

3 Tbsp. water

10Tbsp. sugar

10 Tbsp. white vinegar

2 Tbsp. orange concentrate or the zest of 2 oranges

Directions:

  1. Place chicken pieces in large bowl.
  2. Stir in egg, salt, pepper and 1 Tbsp. oil then mix well.
  3. In separate container, stir 1/2 cup cornstarch and flour together.
  4. Roll chicken pieces in the cornstarch/flour mixture to coat.
  5. Heat oil for deep frying to 375 degrees.
  6. Add chicken to hot oil in small batches, frying for 3-4 minutes or until golden crisp. (Don't overcook)
  7. Remove chicken from oil with slotted spoon and drain on paper towels; set aside.
  8. In a separate bowl combine the ingredients for the Orange Sauce.
  9. In a frying pan or wok, add 1 Tbsp. oil to ginger and garlic.  Fry for 10 seconds or until fragrant.  Add the crushed chilies and green onions.  Add the orange sauce to the ingredients in the wok and bring to a boil.
  10. Add cooked chicken to the wok, stirring until well mixed.
  11. Stir water into remaining 1 Tbsp. cornstarch until smooth and add to the chicken in the wok.  Heat until sauce thickens.
  12. Stir in sesame oil.  This is what gives it that authentic Chinese flavor and smell.
  13. Serve over rice & enjoy.

Fettuccine Alfredo

Fettuccine Alfredo

Ingredients
  • 1/2 cup butter
  • 2 tablespoons cream cheese
  • 1 pint heavy cream
  • 1 teaspoon garlic powder
  • salt
  • black pepper
  • 2/3 cup grated Parmesan cheese (preferably fresh)
  • 1 lb fettuccine, prepared as directed
Directions
  1. In a medium saucepan, melt butter.
  2. When butter is melted, add cream cheese.
  3. When the cream cheese is softened, add heavy cream.
  4. Season with garlic powder, salt, and pepper.
  5. Simmer for 15-20 minutes over low heat, stirring constantly.
  6. Remove from heat and stir in Parmesan.
  7. Serve over hot fettuccine noodles.

White Chili Chicken

White Chili Chicken

Ingredients:

  • 1 lb boneless, skinless chicken breasts, cut into 1/2 inch cubes
  • 1 medium onion
  • 1  1/2 tsp. garlic powder
  • 1 Tbsp. vegetable oil
  • 2 (15 oz) cans Great Dry Northern White Beans, rinsed and drained
  • 1 (14 oz) can chicken broth
  • 1 tsp. salt
  • 1 tsp. oregano
  • 1/2 tsp. pepper
  • 1/4 tsp. cayenne pepper
  • 1 cup sour cream
  • 1/2 cup whipping cream
  • 2 (4 oz) cans diced green chilies

Directions:

  1. In large saucepan, saute chicken, onion and garlic powder in oil till chicken is no longer pink.
  2. Add beans, chilies, chicken broth and seasonings .
  3. Bring to a boil.
  4. Reduce heat and simmer uncovered for 30 minutes.
  5. Remove from heat, stir in sour cream and whipping cream.
  6. Serve immediately.

*****************************************************************
VARIATION FOR USING BOTTLE FOODS

White Chili Chicken

Ingredients:

1 medium onion

1  1/2 tsp. garlic powder

1 Tbsp. olive oil

2 pints OR 1 Quart bottled boneless chicken with stock

1 Quart Bottled Great Dry Northern White Beans

1 (14 oz) can chicken broth (optional)

1 tsp. salt

1 tsp. oregano

1/2 tsp. pepper

1/4 tsp. cayenne pepper

1 cup sour cream

1/2 cup whipping cream (optional)

2 (4 oz) cans diced green chilies

Directions:

In large saucepan, sauté onion and garlic powder in oil till onions are crisp-tender.

Add chicken with stock, beans, chilies, chicken broth and seasonings.

Bring to a boil.

Reduce heat and simmer uncovered for 20-30 minutes.

Remove from heat, stir in sour cream and whipping cream.

Serve immediately.

Darn Good Chocolate Bundt Cake

 HPIM5382

Darn Good Chocolate Bundt Cake
Provided by: Vera Jones

1 pkg. Devil’s Food Cake Mix or Dark Fudge Cake Mix

1 small pkg. chocolate instant pudding

4 large eggs                                     
1 ½ cups semi-sweet chocolate chips

1 cup sour cream                        
½ cup warm water

½ cup vegetable oil                         
Powdered Sugar

  • Preheat oven to 350 degrees.  Grease bundt pan with cooking spray & flour.

  • Mix all ingredients except chocolate chips with a mixer on low for 1 min.  Mix with a spoon then mix on medium for 2-3 min.  Fold in chocolate chips.

  • Bake for 45-50 min.  Cool for 20 min.  Loosen sides with a butter knife.

  • After removing cake, sift powdered sugar on top, or drizzle the glaze below.  This cake tastes better when made 1-2 days ahead of time.  It gets moister as it sits.

HPIM5380 

Glaze - Drizzle over the Top

1 bar (2oz.) Unsweetened Chocolate Baking Bar

1 ½ cups sifted powdered sugar

3 Tbl. butter

2 to 3 Tbl water

1 Tsp vanilla extract

Melt Baking bar and butter in small saucepan over low heat, stirring until smooth.  Remove from heat.  Stir in powdered sugar alternately with water until of desired consistency.  Stir in vanilla extract.

Shepherd’s Pie

Easy_Shepherd_s_Pie

Shepherd's Pie

Ingredients:

1 lb. ground beef (I personally prefer Sausage instead of ground beef)

2 cups  hot mashed potatoes (Feel free to use instant potatoes)

4 oz. (1/2 of 8-oz. pkg.) PHILADELPHIA Cream Cheese, cubed

1 cup  KRAFT Shredded Cheddar Cheese, divided

2 cloves garlic, minced

4 cups  frozen mixed vegetables, thawed (I've also used canned mixed vegetables with good results)

1 cup beef gravy (Or use a regular brown gravy mix)

PREHEAT oven to 375ºF. Brown meat in large skillet. Meanwhile, mix potatoes, cream cheese, 1/2 cup of the shredded cheese and the garlic until well blended.

DRAIN meat. Return to skillet; stir in vegetables and gravy. Spoon into 9-inch square baking dish; cover with potato mixture and remaining 1/2 cup shredded cheese.

BAKE 20 min. or until heated through.

Cinnamon Rolls


CINNAMON ROLLS

INGREDIENTS:

1 cup warm milk (110 degrees F/45 degrees C)
2 eggs, room temperature
1/3 cup margarine, melted
4 1/2 cups flour
1 teaspoon salt
1/2 cup white sugar 
1 Tbls. yeast 
1 cup brown sugar, packed
2 1/2 tablespoons ground cinnamon
1/3 cup butter, softened 
1 (3 ounce) package cream cheese, softened
1/4 cup butter, softened
1 1/2 cups confectioners' sugar
1/2 teaspoon vanilla extract
1/8 teaspoon salt

DIRECTIONS:

1.   Dissolve the yeast in the warm milk in a large bowl.  Let set for 10 minutes.  Mix in sugar, margarine, salt and eggs.  Add flour and mix well.  Knead the dough into a large ball, and dust lightly with flour.  Cover and let rise in a warm place for about 1 hour, or until doubled in size.  After dough has doubled in size, turn it out onto a lightly floured surface, cover and let rest of 10 minutes.

2.   In a small bowl, combine brown sugar and cinnamon.

3.   Roll dough into a 16x21 inch rectangle.  Spread dough with 1/3 cup butter and sprinkle evenly with sugar/cinnamon mixture.  Roll up dough and cut into approximately 12 rolls.  Place rolls in a lightly greased 9x13 inch baking pan.  Cover and let rise until nearly doubled (about 30 minutes).  Preheat oven to 400 degrees Fahrenheit.

4.  Bake the rolls in the preheated oven until golden brown, about 15 minutes.  While rolls are baking, beat together cream cheese, 1/4 cup butter, confectioners sugar, vanilla and salt.  Spread frosting on warm rolls before serving.

Paprika Chicken

Paprika Chicken

Ingredients:

4 boneless skinless chicken breasts

salt to taste

pepper to taste

olive oil

1 large onion, thinly sliced

2 Tbls. paprika

1/2 cup chicken broth

1 (8 oz.) container sour cream

Directions:

Heat oil in a skillet.  Sprinkle salt and pepper on fresh chicken breasts.  Cook chicken over medium-high heat until cooked through and golden brown.  Remove chicken from the pan.  In same pan cook onion until crisp-tender.  Sprinkle onions with paprika.  Return chicken to skillet and add the chicken broth.  Reduce heat to medium-low heat, cover and let simmer for 10 minutes.  Remove from heat and stir in sour cream.  Serve over egg noodles or rice (our family prefers rice).

Dump Cake

Mexican Wedding Cake a.k.a. Dump Cake

Cake Ingredients:

2 cups flour
2 cups sugar
3 eggs
20 oz. can crushed pineapple
1 Tbls. baking soda
1 cup walnuts (or nuts of your choosing)

Frosting Ingredients:

1/2 cup butter
8 oz. cream cheese
1 tsp. vanilla
1 lb. powdered sugar

Directions:

Mix all the cake ingredients together in a large bowl (in no particular order...thus the name "Dump Cake"...you just dump it all in and stir.)  Pour into a greased 9x13 cake pan. and cook for approximately 30 minutes at 375 degrees.  Cooking time may vary depending on altitude.  Cake is done when toothpick or knife comes out clean.  The cake will cook up to be quite dark.  Let the cake cool before mixing and adding the cream cheese frosting.  Enjoy.

Black Beans

Black Beans

Ingredients:

1 Package Black Beans (16 oz or two cups)

1 Package sliced bacon (12 oz)

Minced Garlic to taste (approximately 4-5 cloves)

Salt & Pepper to Taste

2 Bay Leaves

Directions:

Sort and rinse your black beans, place in a crock pot with sufficient water.  Cut up the raw sliced bacon into bite sized pieces, and place in the crock pot with the beans.  Add the garlic, bay leaves, salt & pepper.  Let the crock pot cook for approximately 5 hours, or until beans are tender.  Remove the bay leaves.  Season with salt and pepper to taste.  Serve.

***************************************************************

VARIATION FOR BOTTLING BLACK BEANS

Black Beans (1 Quart)

Ingredients:

1 &1/3 cups dry black beans

1/3 – ½ cup chopped raw bacon

1 tsp. Minced Garlic to taste

Salt & Pepper to Taste

1 Bay Leaf

Directions:

Sort and rinse your black beans. Measure dry black beans into a quart jar. Add raw bacon, minced garlic, and salt & pepper. Fill jar with cool water until there is one inch of headspace at the top. Add the bay leaf. Pressure can the beans according to regular bottling methods. Beans can be stored until you’re ready to eat. Upon opening a jar, remove the bay leaf.  You may need to add additional salt and pepper to taste.  Serve.

Chingarettas

Chingarettas

Ingredients:

2.5 lbs of grated cheddar cheese

1 bunch green onions chopped

1 dozen eggs, hard boiled and chopped

2 cans olives, chopped

2 - 4oz cans diced green chilies (or more to taste)

4 cans tomato sauce

1/2 cup salsa verde sauce

1-2 Tbls. minced garlic

Salt and Pepper to taste

1/4 cup oil (optional)

Directions:

Mix all the ingredients together, in no particular order.  Spread the cheese mixture on split French rolls that have been toasted in the oven on broil.  Then put the rolls with the cheese spread back into the oven on broil until the cheese melts and browns to perfection.  Eat immediately and enjoy.  The cheese mixture can be refrigerated for several days, since the recipe makes a large batch.  Or feel free to freeze it for later if necessary.

Nana McKane’s Rolls

Rolls

Ingredients:

1/2 cup warm water
4 & 1/2 tsp. yeast (2 pkg. yeast)

3 eggs
1/2 cup sugar
1/2 cup oil
1 tsp. salt
4-5 cups flour
1 cup milk

Melted Butter

Directions:

Combine warm water and yeast in a separate bowl and set aside to activate.  Mix remaining ingredients with yeast mixture.  Let rise for 45 minutes.  Turn out of bowl, roll out dough to 1/2 inch thick, and cut into circles.  Dip both sides of dough rounds in melted butter, fold in half like a taco, and place on pan.  Bake at 400 degrees for 15-20 minutes.

Nutty Wheat Pancakes

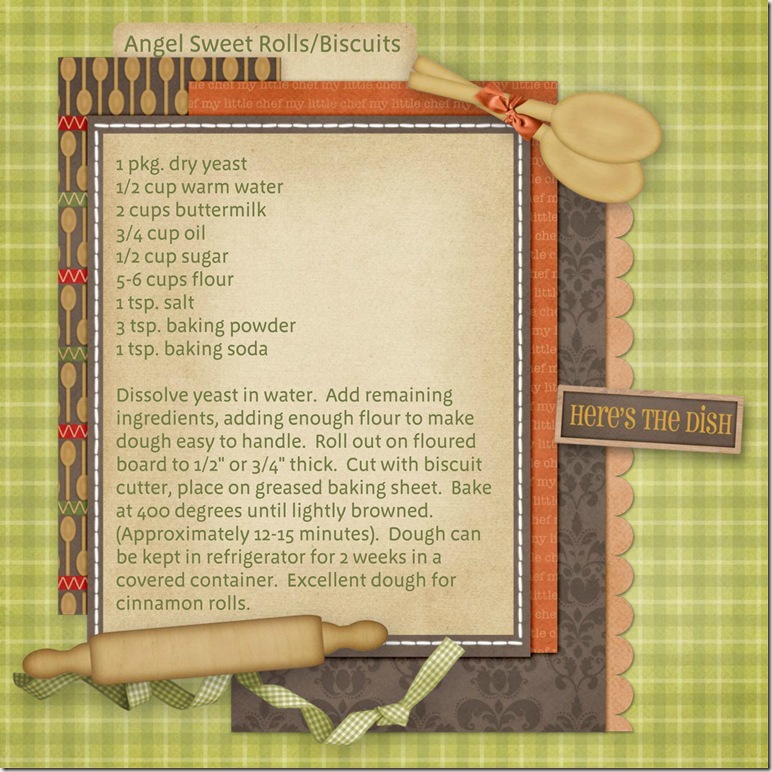
I grew up eating these pancakes.  I always knew what was cooking when I woke up to the sound of the blender pulverizing the wheat.  I recently tried them again on a trip to my childhood home, and felt that the recipe was share-worthy since they tasted as good now as I remember them tasting then.

Nutty Wheat Pancakes

1 Cup Milk
1 Cup Dry Whole Wheat

Blend in blender on high for 4 minutes.

1/2 Cup Milk
1/2 Cup Oil
2 Eggs
1/2 tsp. Salt

Blend in blender for 1 more minute.

4 tsp. baking powder

Blend again, and cook like regular pancakes.

Worlds Best Salsa

Worlds Best Salsa

Ingredients:

2 - 28oz cans petite diced tomatoes

1 bunch green onions finely chopped

1 bunch cilantro (remove stem) chopped

1/3-1/2 - 4oz can diced jalapenos (depends on how hot you want it)

garlic powder to taste

salt to taste

Mix thoroughly in a large bowl for a chunky salsa, or blend for a finer texture.

Chicken Divan

Chicken Divan

Ingredients:

5 chicken breasts

3 packages of broccoli florets

3 cans cream of chicken soup

1 cup mayonnaise

1 Tbls. lemon juice

1 tsp. curry powder

1 cup Parmesan cheese

Paprika

Directions:

Cook chicken via your preferred method (boiled, grilled, etc...) cut into medium pieces.  Cook the broccoli.  Layer broccoli, chicken into a large casserole dish.  In a separate bowl mix the soup, mayonnaise, lemon juice and curry.  Spread evening over the broccoli and chicken.  Cover with Parmesan cheese, and sprinkle with paprika.  Bake at 350 degrees for 30 minutes.

I recommend serving over rice or quinoa.  Quinoa is my favorite!!

Sour Cream Potatoes


Sour Cream Potatoes

Ingredients:

30 oz bag hash browns

1 can cream of chicken soup

16 oz. tub of sour cream

2 cups grated cheddar cheese

3 green onions chopped

corn flakes

1/2 cup butter

Directions:

Mix hash browns, soup, sour cream, cheese and onions in a bowl.  Add salt and pepper to taste.  Spread evenly into a 9x13 inch casserole dish.  Cover in corn flakes, and drizzle melted butter over the top.  Bake at 350 degrees for 30-35 minutes.

Chicken Salad

Chicken Salad

Ingredients:

4 cups chopped cooked chicken OR 2 pints bottled boneless chicken (drained)

1 1/2 - 2 cups mayonnaise

1 1/2 cups chopped celery

1 cup finely chopped almonds or cashews

1/2 cup chopped green onions

1 Tbls. lemon juice

1 can water chestnuts drained and chopped

Directions:

Mix together well, and serve with crackers on on sandwich bread.

Allergy Free Pumpkin Muffins

Allergy Free Pumpkin Muffins

Ingredients:
1-1/2 cups gluten-free all-purpose flour

1 tsp. xanthan gum
1 c. granulated sugar
1/2 tsp. salt
1 tsp. baking soda
1-1/4 tsp. ground cinnamon
1/2 tsp. ground nutmeg
1/8 tsp. ground cloves
1 tsp. vanilla extract
1 15 oz can pumpkin

Directions:
1) Preheat oven to 350 degrees F. Spray muffin tin with cooking spray.
2) In a mixing bowl, combine the flour, sugar, salt, baking soda, cinnamon, nutmeg and cloves. Add the vanilla and pumpkin. Mix until dry ingredients are moistened. Fill each muffin cup about 3/4 full.

3) Bake for 20-25 minutes or until a toothpick inserted in the middle of one of the muffins comes out clean.

Bottled Peach Pie Filling

Bottled Peach Pie Filling

Ingredients:

Fresh Sliced Peaches

1 cup Sugar

1/4 cup + 1 Tbls. Clear Jel starch (recommended) OR 4 Tbls. Cornstarch

3/4 cup Water

1/8 tsp.  Cinnamon

1/8 tsp. Almond Extract

1/4 cup Lemon Juice

Directions:

Blanch and slice enough peaches as necessary to fill 2 quart jars.  Combine other ingredients in a saucepan and heat until thickened.  Pour sauce over the peaches in the jar.  Swirl the jar to remove any air bubbles.  Process in a boiling water bath canner for 35 minutes.

Bottle Roasted Green Chilies

Bottling Roasted Green Chilies:

Because chilies are naturally low in acid, canning them requires special precautions that differ from those followed when canning high-acid fruits. Growth of micro-organisms particularly must be avoided.

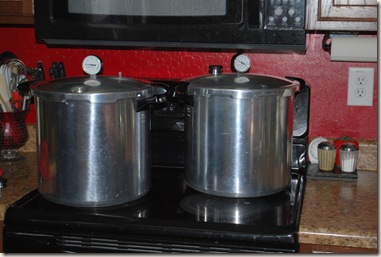
Processing with a Pressure Cooker is the only safe way to can chilies and other non-acid foods.  This guide provides the correct processing times and canner pressures for canning chilies safely.

PREPARING CHILES

Blistering:

The tough outer skin must be removed from chilies. Blistering the skin by one of the following methods makes removal easy.  This process is also known as roasting chilies.

Handling pungent chilies can burn hands and eyes. Protect hands by wearing rubber gloves. Keep hands away from eyes while working with chilies. Wash hands thoroughly before, during and after handling the chilies.

Wash and dry chilies. With a knife, make a small slit in the side to allow steam to escape. Be sure heat source is very hot. Turn chilies frequently to prevent scorching and ensure even blistering. Remove from heat and place chilies in a clean garbage bag, or plastic zipper bag.  This allows the chilies to sweat which makes them easier to peal. 

If chilies are not processed in the pressure canner within two hours after blistering, place them in shallow containers in the refrigerator to prevent spoiling.

The following are three heat-source methods for blistering chilies:

Oven or broiler method - Place chilies in a hot oven or broiler 400-4500F for 6-8 minutes until skin blisters so that it can be pulled away form the flesh.

Range top method - Place chilies on a hot electric or gas burner after covering burner with a layer of heavy wire mesh.

Outdoor grill method - Place chilies on a charcoal grill about 5-6" above glowing coals.

Salt:

If desired, add 1/4 teaspoon of salt per half-pint, or 1/2 teaspoon salt per pint. Salt may be omitted, as it's used only for flavor. For best results, do not use salt substitutes for canning because heat causes some substitutes to become bitter or develop a metallic taste. Instead, add salt substitutes just before serving.

FOLLOW THESE STEPS FOR PRESSURE CANNING (Written for the 23 Quart Presto Pressure Cooker)

Use narrow-mouth or wide-mouth Mason jars with self-sealing lids held in place by screw-on metal bands.  Only half-pint and pint jars should be used for canning green chilies.

  • Wash jars by hand or in the dishwasher.
  • Prepare chilies.
    • Remove peels, stems, and seeds from chilies. Chilies can be cut in pieces or left whole.
  • Place canning rack on the bottom on the canner.
  • Fill pressure cooker with water to bottom line, 1 inch deep, (approximately 3 quarts) + add 2 tablespoons white vinegar to the water in the canner. {Vinegar is optional – it simply helps prevent staining on the interior of your pressure canner.}
  • Set canner on heat.
  • Place Mason jar lids in small saucepan add water, place on heat and boil.
  • Fill each jar with prepared chilies.  Be sure to leave 1 inch head-space at top of jar.
    • Cold foods in cold jars.
    • Hot foods in hot jars.
  • Remove any air bubbles.
    • Use a Non-Metallic spatula.
  • Clean the top of the Mason jar making sure it is free of debris or nicks.
  • Place boiled jar lid on the Mason jar and tighten cap firmly with a ring.
  • Set jar in the canner.
  • Place jars loosely to allow for even steam circulation.
  • Place canning rack between rows of jars if you plan on stacking jars within the canner.
  • When canner is full, place lid on the canner and tighten securely.
  • Turn heat to high.
  • Allow steam to build and vent for approximately 10 minutes.
  • Place the pressure regulator/jiggler on the vent pipe.
  • Allow pressure to build to 15 lbs.
  • Processing time begins when pressure gauge registers the correct pressure.
    • Processing time starts all over if pressure ever drops below 15 lbs.
  • Turn heat down or regulate heat to maintain 15 lbs. pressure.
    • Every stove is different. It may take some experimenting to determine the best setting on your stove for pressure regulation.
    • Your best heat setting for pressure regulation is:_____________________
  • Processing Times for Chilies 

    Half-pint
       35 min.  15lbs

    Pint
       35 min.  15lbs

  • At the end of the processing time, turn the burner off and slide canner off the heat source.
  • Let pressure drop on its own.
  • When pressure has completely dropped remove the pressure regulator/jiggler from the canner.
  • Wait 10 minutes before removing the lid from canner.
  • Gently remove jars from the canner.
    • CAUTION: Contents inside the jar may be boiling.
  • Set jars upright on a cooling rack or thick cloth, approximately 2-3 inches apart.
    • Avoid cool air, cold surfaces or a draft.
  • When jars are cold (cool overnight) test seal and remove the mason ring.
  • Wash/rinse jars in warm water before drying & storing.

REPROCESSING UNSEALED JARS

Remove lids from unsealed jars and discard. Check sealing surface of jar for tiny nicks or cracks. If the jar has defects, discard it and replace with another jar. If not, add a new lid and process for the same amount of time within 24 hours. Unsealed jars can be kept in the refrigerator and the food used within 3-4 days, or remove about an inch of the contents and freeze.
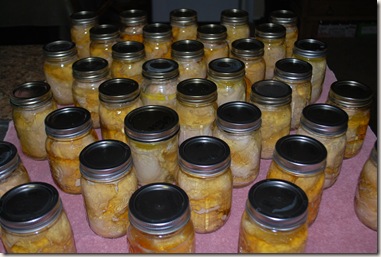
Bottled Apple Pie Filling


Apple Pie Filling

Ingredients:

  • 2 & 1/3 cups white sugar

  • 1/2 cup and 1 teaspoon Clear Jel
  • 1 teaspoon ground cinnamon
  • 1/8 teaspoon ground nutmeg
  • 1 teaspoon salt
  • 5 & 1/4 cups water
  • 1 tablespoon and 1 & 3/4 teaspoons lemon juice
  • 1 drops yellow food coloring
  • 3 pounds apples

Directions:

In a large pan, mix sugar, cornstarch, cinnamon and nutmeg. Add salt and water and mix well. Bring to a boil and cook until thick and bubbly. Remove from heat and add lemon juice and food coloring.

Sterilize canning jars, lids and rings by boiling them in a large pot of water.

Peel, core, and slice apples. Pack the sliced apples into hot canning jars, leaving a 1/2 inch head-space.

Fill jars with hot syrup, and gently remove air bubbles with a non-metallic knife.

Put lids on and process in a boiling water bath canner for 20 minutes.

Bottled Sausage and Other Ground Meats

So, this is my first time bottling sausage.  I'm anxious to actually open a bottle and taste it.  Someone once told me that it was important to precook ground meats like burger and sausage before bottling it, in order to preserve the flavor.  They said that if you don't precook the ground meats, they end up tasting like dog food.  Who wants to eat dog food?  Not me...so I took their word for it, and chose to precook my sausage meat.

I had 16 lbs of sausage, but only cooked up 13 lbs of it.  That was by far the most labor intensive part.  I loaded the pint jars, and put them in the pressure cooker...that was the easiest part.  Then I just had to wait for the jars to pressurize and steam for 75 minutes.  And here is a picture of my labors.

Bottled Cherries – Pits In

I bottled the cherries with pits in since the cherries were very ripe, and I didn't want to them to spoil.  The process is very simple and hassle free. 

  • Simply remove the stems and place the cherries in your quart jars. 
  • Prepare a thin syrup by boiling water and sugar together. 
  • Pour the syrup over the cherries. 
  • Remove the air bubbles from the jar by swirling the cherries in the syrup.
  • Boil your lids, screw on the lids and rings, and place in the water bath.
  • Process in a boiling water bath for 25 minutes.

Vanilla Apricots

Bottled Apricots with Vanilla

Ingredients:

about 3 pounds firm but ripe apricots
2/3 cup sugar
1/2 cup freshly squeezed lemon juice
1 1/2 cups water
2 whole vanilla beans

Directions:

1. Immerse the apricots in a pan of gently boiling water for 20 to 30 seconds. Immediately remove the apricots from the water and remove their skins using a small sharp knife or your fingers, if they come easily. Leave to cool.

2. Put the sugar, lemon juice, and water in a saucepan over low heat, stirring, until the sugar has dissolved. Bring to a boil.

3. Add the apricots to the syrup, in batches, if necessary, and poach (simmer on low heat) for 10 minutes.

4. Using a slotted spoon, immediately transfer the apricots to two warm, sterilized 5-cup jars. Slit the vanilla beans lengthwise with a knife and add two halves to each jar.

5. When all the apricots have been removed from the pan, boil the syrup for 5 minutes. Pour into prepared jars to within 1/2 inch of the top. Swirl the jars to expel any air bubbles and seal them. Process in a boiling water canner for 30 minutes.

6. Store in a cool, dark, dry place for one month before eating. Use within 12-18 months.

Bottled Butter


(I haven't tried this yet, but I have friends that have.  I look forward to trying it soon.)

1. Use any butter that is on sale. Lesser quality butter requires more shaking (see #5 below), but the results are the same as with the expensive brands.

2. Heat pint jars in a 250 degree oven for 20 minutes, without rings or seals. One pound of butter slightly more than fills one pint jar, so if you melt 11 pounds of butter, heat 12 pint jars. A roasting pan works well for holding the pint jars while in the oven.

3. While the jars are heating, melt butter slowly until it comes to a slow boil. Using a large spatula, stir the bottom of the pot often to keep the butter from scorching. Reduce heat and simmer for 5 minutes at least: a good simmer time will lessen the amount of shaking required (see #5 below). Place the lids in a small pot and bring to a boil, leaving the lids in simmering water until needed.

4. Stir the melted butter from the bottom to the top with a soup ladle or small pot with a handle; pour the melted butter carefully into heated jars through a canning jar funnel. Leave ½” of head space in the jar, which allows room for the shaking process.

5. Carefully wipe off the top of the jars, then get a hot lid from the simmering water, add the lid and ring and tighten securely. Lids will seal as they cool. Once a few lids “ping” shake while the jars are still warm, but cool enough to handle easily, because the butter will separate and become foamy on top and white on the bottom. In a few minutes, shake again, and repeat until the butter retains the same consistency throughout the jar.

6. At this point, while still slightly warm, put the jars into a refrigerator. While cooling and hardening, shake again, and the melted butter will then look like butter and become firm. This final shaking is very important! Check every 15 minutes and give the jars a little shake until they are hardened in the jar! Leave in the refrigerator for an hour.

7. Canned butter should store 3-5 years or longer on a cool, dark shelf. It does last a long time. Canner butter does not “melt” again when opened, so it does not need to be refrigerated upon opening, provided it is used within a reasonable length of time.

Strawberry Freezer Jam

Strawberry Freezer Jam

2 cups crushed strawberries (buy 1 qt. fully ripe strawberries)

4 cups  sugar, measured into separate bowl

3/4 cup water

1 box  SURE.JELL Fruit Pectin

RINSE clean 5 (1-cup) plastic containers and lids with boiling water. Dry thoroughly.

Strawberries de-greened and rinsed in the sink

HPIM4663

Strawberries crushed and ready for measuring

HPIM4664

Strawberries measured in with the sugar               

HPIM4665


Strawberries mixed with the sugar

HPIM4667

STEM and crush strawberries thoroughly, 1 cup at a time. Measure exactly 2 cups prepared fruit into large bowl. Stir in sugar. Let stand 10 minutes, stirring occasionally.

MIX water and pectin in small saucepan. Bring to boil on high heat, stirring constantly. Continue boiling and stirring 1 minute. Add to fruit mixture; stir 3 minutes or until sugar is dissolved and no longer grainy. (A few sugar crystals may remain.)

HPIM4668

FILL all containers immediately to within 1/2 inch of tops. Wipe off top edges of containers; immediately cover with lids. Let stand at room temperature 24 hours. Jam is now ready to use. Store in refrigerator up to 3 weeks or freeze extra containers up to 1 year. Thaw in refrigerator before using.